Showing posts with label tutorial. Show all posts

Friday, February 3, 2012

New items in the shop & a great tutorial!

I am super lucky that I get to hang out with several great women every month at the Madison Modern Quilt Guild meetings. One of those women is the amazing Jeni from In Color Order. If you haven’t been reading her blog, head on over there ASAP! She’s a tiny little ball of energy & her blog is great. She’s going to have lots of quilt-alongs, tutorials, and other exciting things coming up this year.

At our last meeting, she gave us preview of a quilt she designed for the Moda Bakeshop. It’s a beautiful chevron quilt made with a new line called A Walk in the Woods designed by Aneela Hoey for Moda. The free pattern tutorial is much easier than it appears. It’s constructed of nine patches & looks like it should go together pretty quickly.

jeni

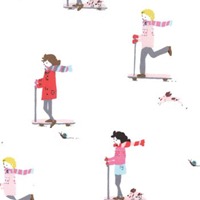
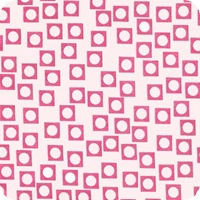
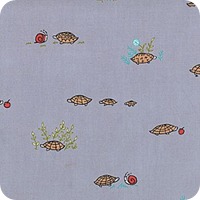
Unfortunately, I do not have the new line from Aneela Hoey in my shop, but I do have pieces from Aneela’s other lines, Sherbet Pips and Little Apples that are newly listed in my shop! This quilt would be just as cute in either one of those lines.  Check them out  and buy them up here…

18500_12  18501-11  18502-1518504-16  18506-16  18511-1118512-51  18513-15  18514-2018515-19  18516-12  18517-1218517-15   AH-LA-CP

More new items are going to be listed in the shop early next week. Stayed tuned!

Sig

Monday, January 2, 2012

Machine Sewing a Binding

We’ve been going to a friend’s house for a New Year’s festivities every year since 2000. In 2002, our friend started making commemorative t-shirts for us every year. On January 1st last year, I decided that I would make a t-shirt quilt from all of our annual shirts to give as a gift to our friend this year. I actually completed the quilt early this summer, and was pretty proud of myself for being so ahead of the game. And then it sat. And sat. I didn’t quilt it until the week before Christmas. And I was sewing the binding on as late as 2 hours before the party on New Year’s Eve. Sigh.

Luckily, I can put a binding on pretty fast. I haven’t hand stitched a binding in ages. I just don’t have the time or patience for that anymore. I want the binding to be done ASAP, so I’ve been completely machine stitching my bindings for a while.

I decided to write up a tutorial to show you how I do it. I’m assuming that you already generally know how to do bindings, so my instructions don’t include the cutting of your binding or how to sew mitered corners. I can give you more info on that if you’re really interested. This tutorial is about how to machine finish the binding, and a pain-free way to measure at the end so that your binding is the perfect length.

I start out by sewing the binding onto the BACK of my quilt. Normally when you will be finishing your binding by hand stitching, you sew it to the FRONT of your quilt. But when machine finishing the binding, you will have a second line of stitching on your quilt just a hair away from the binding. I like to have that second line on the back so the front looks much cleaner.

DSCF6695

Leave a rather large spot with no binding sewn. I like to have about a 10 inch gap, but it doesn’t have to be exact by any means. If your gap is too small, it can get difficult to maneuver. Trim the right binding tail so that it ends somewhere near the middle of the gap. Again, exactness is not necessary here.

DSCF6698

Lay the left binding tail on your quilt, and lay the right binding tail on top of the left binding. Make a mark onto the left binding where the right binding ends. Make a second mark closer to the end of the binding tail that is equal to the width of your binding. I like hefty bindings, and I cut mine at 2 3/4 inches, so my second mark will be 2 3/4 inches away from my first mark.  Cut the binding on the second mark.

DSCF6699   DSCF6701b

So far, it’s been pretty easy. But here is where it gets easy to screw up, so put your attention hats on. Open both binding tails so that the right sides are against your quilt, wrong sides are facing you. In order to keep track of which direction everything needs to go, I usually put pins in at a 45 degree angle as a visual cue to myself.

DSCF6707

Now fold the left binding down in the direction of the pin, and fold the right binding up. When you match the bindings up along the folds, your pins should be lined up. Open up the bindings so right sides are together, matching the red to red and yellow to yellow in my pic below.
  DSCF6708b

I rarely pin when quilting, but this is a point where it’s absolutely necessary. It’s so easy to forget what goes where and what sides to sew once you get this back to your machine. I also like to mark corner to corner so I don’t sew the wrong corner to corner (I’ve done that my fair share already).  Now stitch on that line, but DON’T CUT anything yet.

DSCF6709b  DSCF6711

Open it up to make sure that you have sewn it right. When you open it with the wrong sides facing you, you should see a nice little square. Trim 1/4 inch from your stitching, and fold the binding wrong sides together. You will end up with the EXACT length of binding as you left in your gap. Almost like magic, right?
 DSCF6712  DSCF6714

Moving on to the next step, we need to fold the binding over to the front of the quilt and stitch.  I love using my Zip Bind Tool for securing the binding at this point. It’s much easier than those silver hair clip things that a lot of people use. You load all the clips into the top of the tool, shake it so one clip gets in the ready position, then press and slide the purple thing to basically shoot a clip into place. Just slide the clips off while you’re sewing, then reload your Zip Bind when you need to clip some more.

DSCF6715  DSCF6718

For sewing the binding, I use a joining foot. I think it’s a joining foot. I don’t really know what it’s called, but it works great for this purpose. It has an edge guide in the middle of the foot, which I place right up against the binding. I then put my needle position a smidge to the right & sew away.

DSCF6720

Once the entire binding is on, the top of your quilt binding will look like the pic below. This is an extreme closeup, so your stitching won’t be quite as noticeable.

DSCF6721

The back of your binding will be similar, but will have a stitch line right next to the binding instead of on top of the binding. I know you’re thinking “Gosh, Amy this looks fabulous! You’re amazing!” And you would be right. But there are spots in the quilt where the stitching goes a little farther away from the binding on the back, and even one spot where it is on top of the binding. It’s so hard to get it exactly perfect. That’s why I sew the binding on the back to begin with. I want the top of the quilt to look perfect, and I’m ok with letting the back be a tiny bit wonky in places. If your binding is a different color than your quilt back, you may want to use different color threads in the top and bobbin.

DSCF6722

If you’re entering your quilt into shows and will be having the quilt police examine every inch, you definitely want to hand stitch your binding. But for utilitarian bed quilts or wall quilts, I like machine stitching the binding.  It’s so much faster, and it’s even more durable for frequent washings.
And the completed quilt modeled by my son…

DSCF6726

I hope the tutorial was helpful! Let me know if you have questions.

Sig

Wednesday, October 26, 2011

Camera Strap Tutorial

I've been without a camera strap for quite a while. While attending Quilt Market last spring & fall, I had to keep my camera in my rolling case. So every time I saw something I wanted to take a picture of (which was often), I had to find a place to stop that was out of the line of traffic, unzip the case, find the camera, take a picture, put the camera back, and zip up the case. WAY more trouble than it's worth. I decided that this year, I definitely need a neck strap for my camera.

Lots of quilters have cool looking straps, so I didn't want to buy a boring black one, and I set off to make one instead. There are tons of tutorials online on sprucing up your camera strap.  But they are ALL assuming that you already have a strap & didn't somehow lose yours many moons ago. Most tutorials are for how to make a cool cover for your existing strap. Since I really didn't feel like going to buy a strap just to cover it, I had to figure out a way to make my own.

Most camera straps use 1/2 inch nylon webbing looped through metal loops on the camera, held together with adjustable slides. I didn't have 1/2 inch nylon webbing in the house, or those little plastic slides, so I did some improvising. The downside is that my strap is not adjustable, but I can live with that.
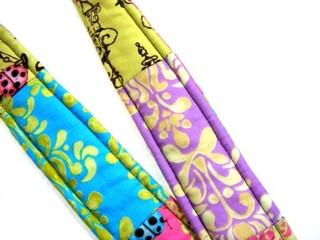
To make my strap I used:
16 pieces of fabric 4 1/2 by 2 1/4 inches
1 piece of fabric 3 by 2 1/4 inches
2 pieces of batting or fleece 32 by 2 1/4 inches
2 keyrings
grosgrain ribbon


Start out by sewing your pieces together into two long strips. Press seams open to eliminate bulk.

Sew the 3 inch piece onto one of the strips, then trim the piece on the other end so that the strip is 32 1/2 inches. This will offset the strips so that your seam allowances don't fall in the same places in the front and back. That way you can be lazy & not worry about matching seams up. Plus you want as little bulk as possible around your neck.

I used a scrap of a bee fabric from Tina Givens that I love love love. It is the very last piece of this fabric that I have, so I wanted it to be in a prominent spot.


Place your strips right sides together along with batting or fleece. I wanted my strap to be squishy, so I used two pieces of fleece inside mine.

After sewing all layers together, turn right sides out, press, and topstitch the long sides.


Cut two pieces of grosgrain ribbon 8 inches long. Fold the ribbons in half, and insert one loop into each end of the strap. Stitch across the bottom several times to secure it. I went over mine 5 or 6 times, plus I stitched an X over the end of the ribbon. This is the biggest stress point on the strap, so you want to make sure that it's secure and your stitches won't have a chance to get loose. Put one keyring through each loop.


Cut two more pieces of grosgrain ribbon, 8 inches long. Burn the ends to keep them from raveling. These are the pieces that you'll use to attach the strap to your camera. Then fold the ends over to form a smaller loop. Stitch to secure, going over it 5 or 6 times. Insert the larger loop portion of the ribbon through the small metal loop on your camera.


Then insert the small loop portion through the large loop and pull tight to secure. Finally, put the small looped ends through the keyrings & your strap is attached to the camera, ready for some at-a-moment's-notice picturetaking action.


Tuesday, October 25, 2011

Sunglasses Case Tutorial


I've been sewing lots of little travel-type things to take with me on my trip to Houston this Friday. I sewed a cute case for my sunglasses today. I always just toss my sunglasses in my purse and they end up getting scratched. So I decided I needed a case to take with me. It was super easy and literally took 15 minutes to make.

I have lots of tiny tiny scrap "strings". I don't like to throw them out because I think they just look cool, even though I have no idea what to use them for. I decided that this small project would be great for using the scrap strings.

I started by ironing them & laying them out in a pleasing arrangement. In order to keep them together, iron a piece of freezer paper on top of them. That will allow you to pick the whole piece up.


Then iron a piece of fusible webbing onto the back and peel the freezer paper off of the front.


Trim the two long sides and iron it onto a black square. I cut two 7 inch squares for this project. After fusing the strings to the square, trim the excess off.


Lay it on a piece of batting & quilt the two layers together. I did some stright line quilting on mine to hold the strings in place. At this point, I thought it was looking pretty cool. We are having a potholder swap in my Modern Quilt Guild next month. For half a second, I wanted to keep this as a potholder for the swap. But since I have a whole month to get another potholder done & I need a sunglasses case ASAP, I forged ahead.


Lay the quilted square on top of the other cut square, right sides together, and stitch around all four sides, leaving a small opening at the top for turning. Trim the corners, turn, and press.


Stitch along the entire top side really close to the edge.


Fold the square in half, and stitch along the side and bottom and you're done! Very easy, and easily customizable. Any two 7 inch squares will do. You can use just two pieces of your favorite patterned fabric, two 7 inch squares made of patchwork, solid fabric with applique, or whatever you can think of.


Share pictures with me if you decide to make your own!